DIY Photo Display: Showcase Your Memories
Preserving memories is a beautiful thing, and what better way to do it than with a personalized photo display? Forget expensive store-bought solutions! This article will guide you through three different DIY photo display projects – a gallery wall, string lights with clips, and a unique photo transfer – all easily achievable regardless of your crafting experience. Let's transform your cherished photos into stunning home decor! Before we dive into photo displays, consider enhancing your home with other DIY projects – a fresh coat of paint, some new DIY painted vases can really brighten up a space!
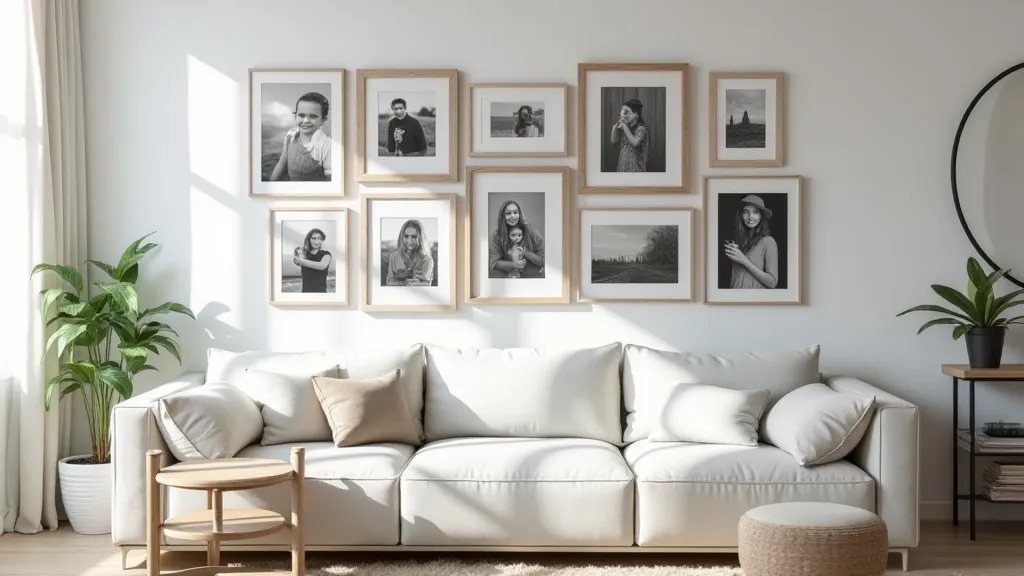
Project 1: The Gallery Wall – A Classic Charm
A gallery wall is a fantastic way to fill a large space and create a visually interesting focal point. It doesn’t require fancy skills; it’s all about the arrangement!
Materials You'll Need:
- Assorted photos (different sizes work well!)
- Picture frames (mismatched frames add character, or choose a unified theme)
- Picture hanging hardware (nails, hooks, picture hangers)
- Measuring tape
- Pencil
- Level
Instructions:
- Plan Your Layout: Lay out your frames on the floor in the arrangement you like. This helps visualize the final look. The arrangement itself can be a form of art; think about how it complements other design elements in your room.
- Mark Your Wall: Using your layout as a guide, mark the position of each nail or hook on the wall.
- Hang Your Frames: Use a level to ensure your frames are straight. If you’re looking to create a warmer, more inviting atmosphere, consider adding some DIY candle holders to your gallery wall’s surroundings.
- Step Back and Enjoy!
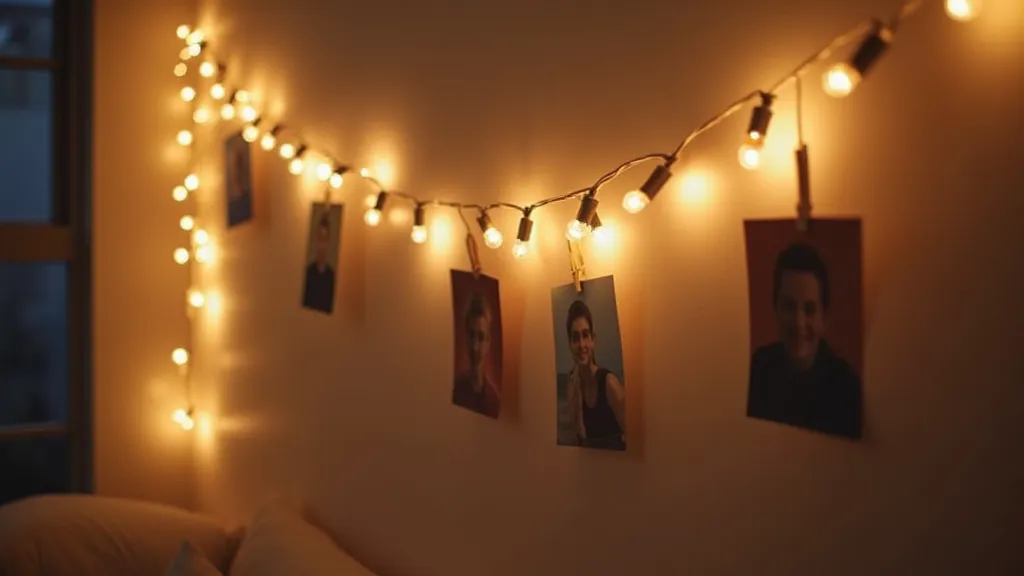
Project 2: String Lights with Clips – A Whimsical Touch
String lights add a warm and inviting glow to any room. Adding clips allows you to easily display photos without damaging them! Creating a cozy, personalized space often involves layering different elements, and string lights are a perfect way to achieve that. You could even enhance the ambiance by creating some DIY candle holders to place near the lights.
Materials You'll Need:
- String lights (fairy lights or LED string lights work best)
- Mini clothespins or binder clips
- Photos
Instructions:
- Hang Your Lights: Secure your string lights along a wall, headboard, or across a window.
- Attach Your Photos: Clip your photos onto the string lights using the clothespins or binder clips.
- Enjoy the Cozy Ambiance! Think about how you could tie in other elements of your decor – perhaps some floating shelves for displaying small trinkets alongside your photos.
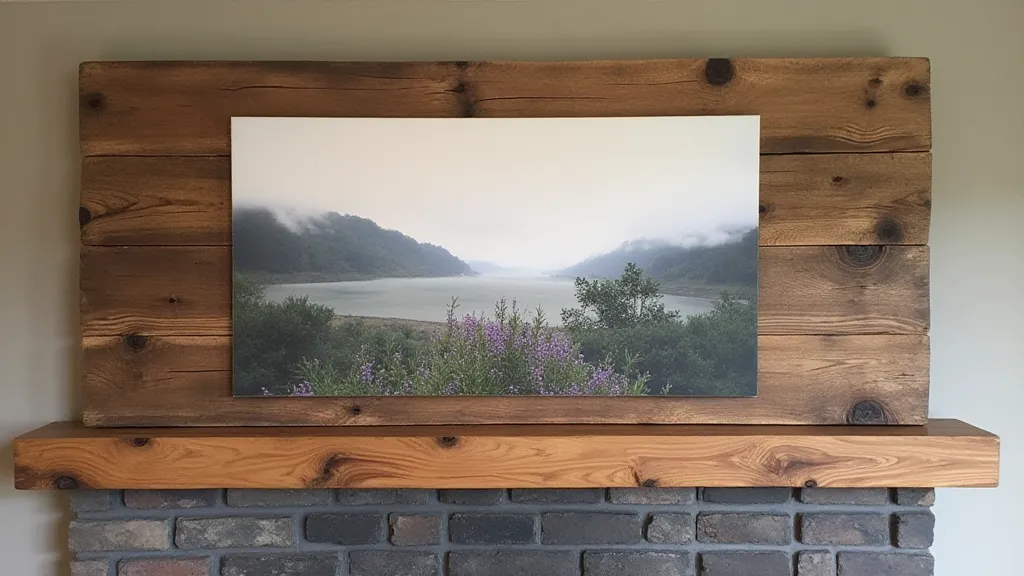
Project 3: Photo Transfer Project – A Rustic Charm
This project creates a unique, vintage-style look for your photos. While requiring a few extra steps, the result is incredibly rewarding! This technique offers a rustic feel, perfectly complementing a cozy and personalized space. Imagine the possibilities – you can incorporate this project into a wider design scheme, perhaps using floating shelves to display multiple photo transfers.
Materials You'll Need:
- Photo
- Mod Podge
- Wooden board or canvas
- Foam brush
- Scissors
- Clear acrylic sealer (optional)
Instructions:
- Prepare Your Photo: Trim your photo to the desired size and shape.
- Apply Mod Podge: Generously coat the front of the photo with Mod Podge.
- Attach to Surface: Carefully place the photo, Mod Podge-side down, onto the wooden board or canvas.
- Smooth and Dry: Smooth out any wrinkles or bubbles and let it dry completely.
- Remove Paper: Gently wet the paper and peel it away from the wood, revealing the image. This may take some patience!
- Seal (Optional): Apply a layer of clear acrylic sealer to protect the image. Consider using DIY macrame plant hangers to create a similar bohemian, handcrafted feel.
These are just a few ideas to get you started! The possibilities are endless when it comes to DIY photo displays. Let your creativity shine and personalize your space with your cherished memories! And remember, DIY projects don’t have to stop at photo displays – you can add personality to every corner of your home!
Expanding Your DIY Home Decor
Creating a truly personalized space is about more than just displaying photos. It's about layering textures, colors, and handcrafted elements. The projects detailed in this article offer a starting point for a larger DIY journey. Think about the overall aesthetic you want to achieve – whether it's rustic farmhouse, modern minimalist, or bohemian chic – and select projects that align with your vision. Don't be afraid to experiment and combine different techniques. After all, the most rewarding DIY projects are those that reflect your unique style and personality.
Tips for a Successful DIY Project
- Gather Your Materials: Before you begin, make sure you have everything you need. This will save you time and frustration.
- Read the Instructions Carefully: Understanding the steps involved is crucial for a successful outcome.
- Don't Be Afraid to Ask for Help: If you're stuck, reach out to friends, family, or online communities for assistance.
- Embrace the Imperfections: DIY projects are not about perfection; they're about creating something unique and personal.
- Have Fun! Enjoy the process of creating something beautiful with your own hands.